VBOX Mini LapTimer
(RLVBLAPMINI)
This guide explains how to install and set up VBOX Mini LapTimer for basic operation.

This guide explains how to install and set up VBOX Mini LapTimer for basic operation.

Before You Start
What is in the Box?
Typical kit includes:
- VBOX Mini LapTimer unit
- Power cable (vehicle supply)
- SD card
- GNSS antenna
- Mounting solution
Setup
1. Insert the SD Card
Insert a FAT32-formatted SD card into the side of the unit. For reliable operation, use a Class 10 card or higher.
All logged data is recorded directly to the SD card.
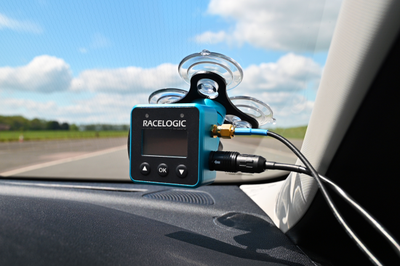
2. Connect and Place the GNSS Antenna
Connect the supplied GNSS antenna to the antenna connector.
For best results:
- Mount the antenna on the vehicle roof
- Ensure a clear view of the sky
- Avoid mounting near roof bars or other metal objects
Correct antenna placement is important for reliable lap timing and speed measurements.
3. Connect Power
Connect the supplied power cable to the POWER connector on the unit and to a compatible 12 V vehicle power source.
The unit will power on automatically.
When powered on, the unit will:
- Search for satellites
- Detect the SD card
- Load nearby track layouts automatically (when available)
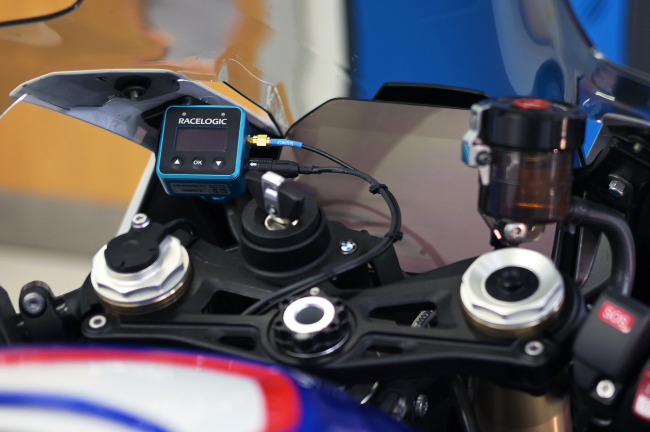
4. Mount the Unit
Mount the display securely in a visible location using the supplied mount.


5. Select a Display Mode
Use the arrow buttons to select the required display mode.
Available modes include:
- Lap Timing
- Predictive Lap Timing
- Speed Display
The selected mode determines the information shown on the display during use.
The unit will remember the previously used display mode after power cycling.
Check it is Working
The system is ready when:
- Satellite lock has been acquired
- An SD card is inserted
- The required display mode has been selected
- Live data is visible on the display
If the unit cannot detect an SD card, it will display a No Media message while the vehicle is travelling at 5 mph or less.
Ready for Use
Once set up:
- The unit is ready for basic use
- The unit is ready to log data to the SD card
- Additional configuration can be completed if required
You are now ready to begin driving.
Logging Data
The unit records data to the SD card while logging is active.
IMPORTANT
Do not remove the SD card while logging is active as it may cause data loss or file corruption.
Always stop logging before removing the SD card.
Lap Timing
Lap timing begins automatically once a valid start/finish line has been crossed.
Additional lap timing features, including predictive timing and reference laps, are covered in the User Guide.